You can create a new document from scratch in 2 ways:
- By typing directly in the editor and formatting the content using the block type options
or - By using the Generate text option
To create a new document from scratch, follow these steps:
- Click the + icon corresponding to the Boards on the left navigation panel. A list of options is displayed.
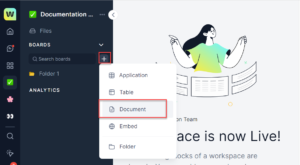
- Click Document. A new document is created by default, the name of the document is “Document<number>”. You can edit the name as per your requirement.
Add content directly
You can start typing directly in the editor section of the document and use the formatting options to edit the content to make it look as per your requirement.
To learn how to start typing in the editor, follow these steps:
- Click the cursor on the document where you want to start typing. You can use the block types options also to set the required styles. For more information about block types, see Manage a document.
- Select the part of the content or a section you want to format. Once the text is highlighted a toolbar options wizard is displayed with a list of actions you can perform on the content.
Generate text using AI
You can Generate text using the AI option by providing a prompt and then a new document is created with the required content. You can copy and paste the generated content into the editor window and using the toolbar options wizard modify it as per your requirement.
To generate text using AI, follow these steps:
- Click the Generate text option in the new Document you created.
or
Click the T icon on the header section in the new document you created.
The Text Generation dialog is displayed.

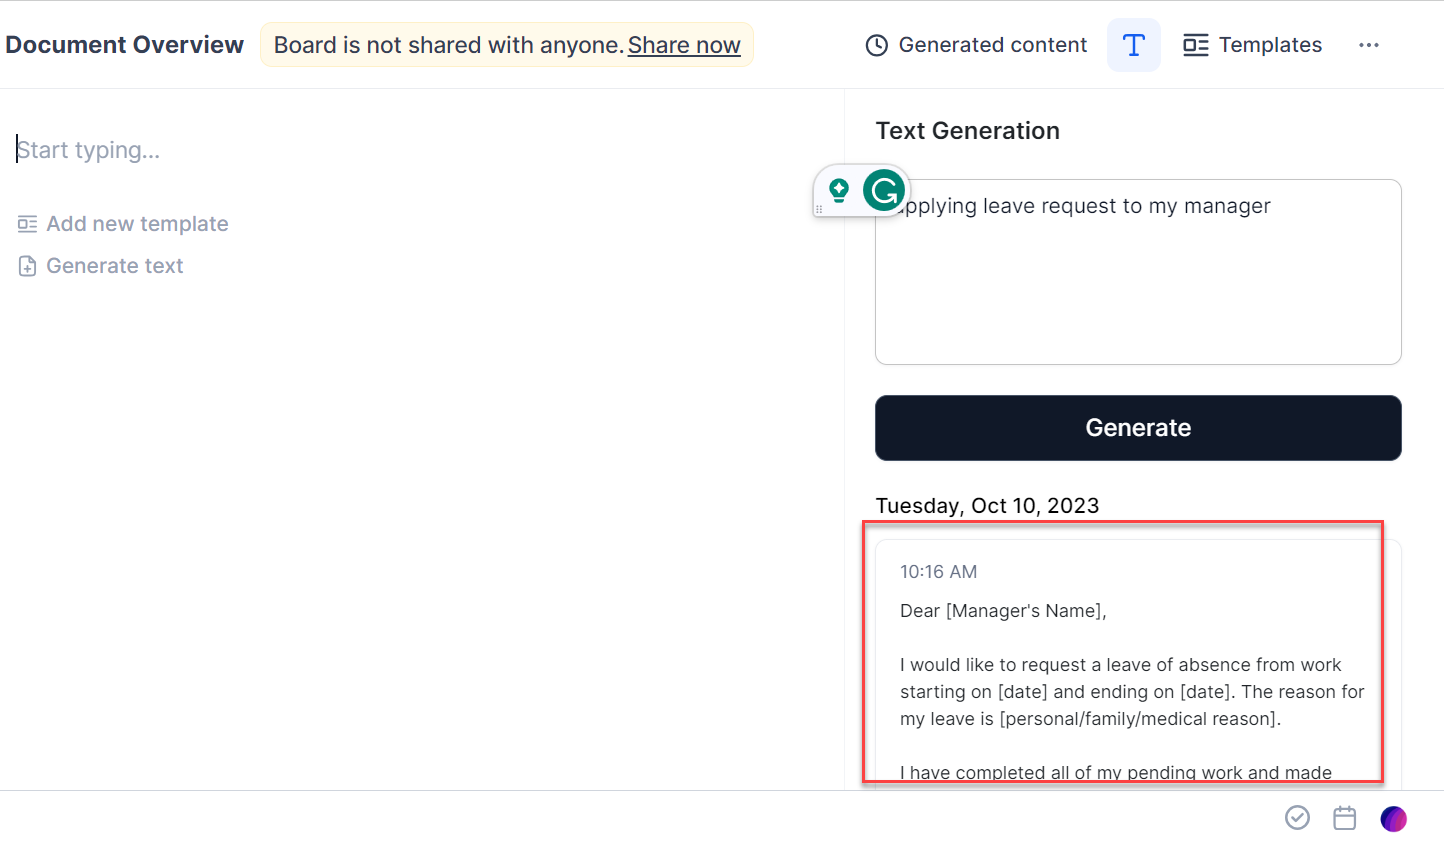
- Enter a prompt in the text box in the Text Generation dialog and click Generate. A result is displayed under the Text Generation section on the document page based on the prompt you have provided. For example, if you provide a prompt “apply leave request to the manager” then AI will provide a sample of leave request as shown in the following image.
 Note: You can perform other actions on the generated result such as Expand to view the result in an expanded view, Copy to copy the result to the editor window, and Delete if you don’t like the result and want to modify your prompt further.