You can create a new workspace from scratch or join an existing workspace.
To create a new workspace, do any one of the following:
- From the All-Workspaces icon
- From the left panel corresponding to the workspace name
- From the Workspace landing page
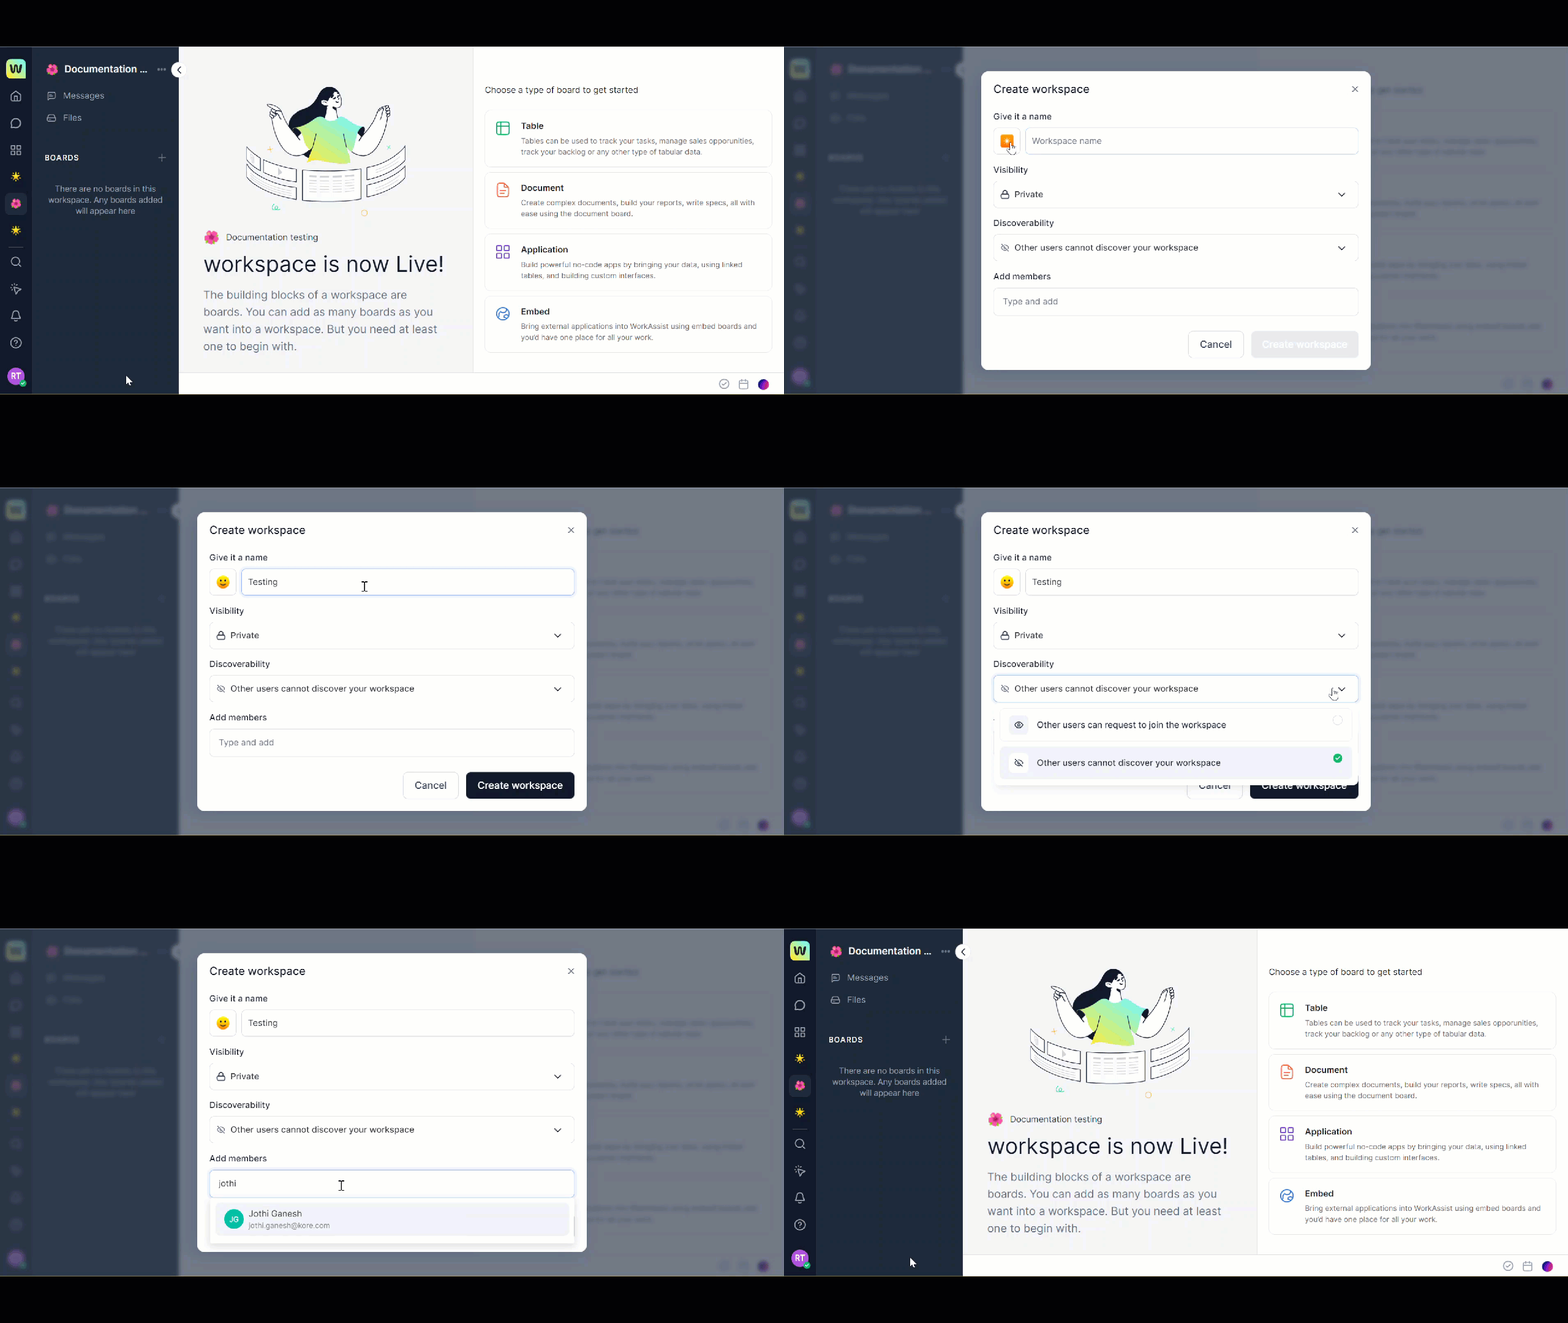
To create a workspace from the All-Workspaces icon, follow these steps:

- Hover over the
 icon on the primary navigation panel and All workspaces pop-up is displayed.
 - Click the + icon on the All workspaces pop-up. The Create Workspace dialog box is displayed.
- Enter a workspace name in the Give it a name field.
- Select the icon to select an emoji for your workspace. The list of emojis is displayed and you can select.
- Select Visibility from the drop-down box. You can select from one of the following:
Private: Your workspace is discoverable by members only if they are invited.
Public: Anyone in the organization can join this workspace. - Select Discoverability from the drop-down box. You can select from one of the following:
Other members can request to join the workspace.
Other members cannot find your workspace. - Type and add members in the Add members field.
- Click Create workspace. Your workspace is live now and you can start adding boards from this space.
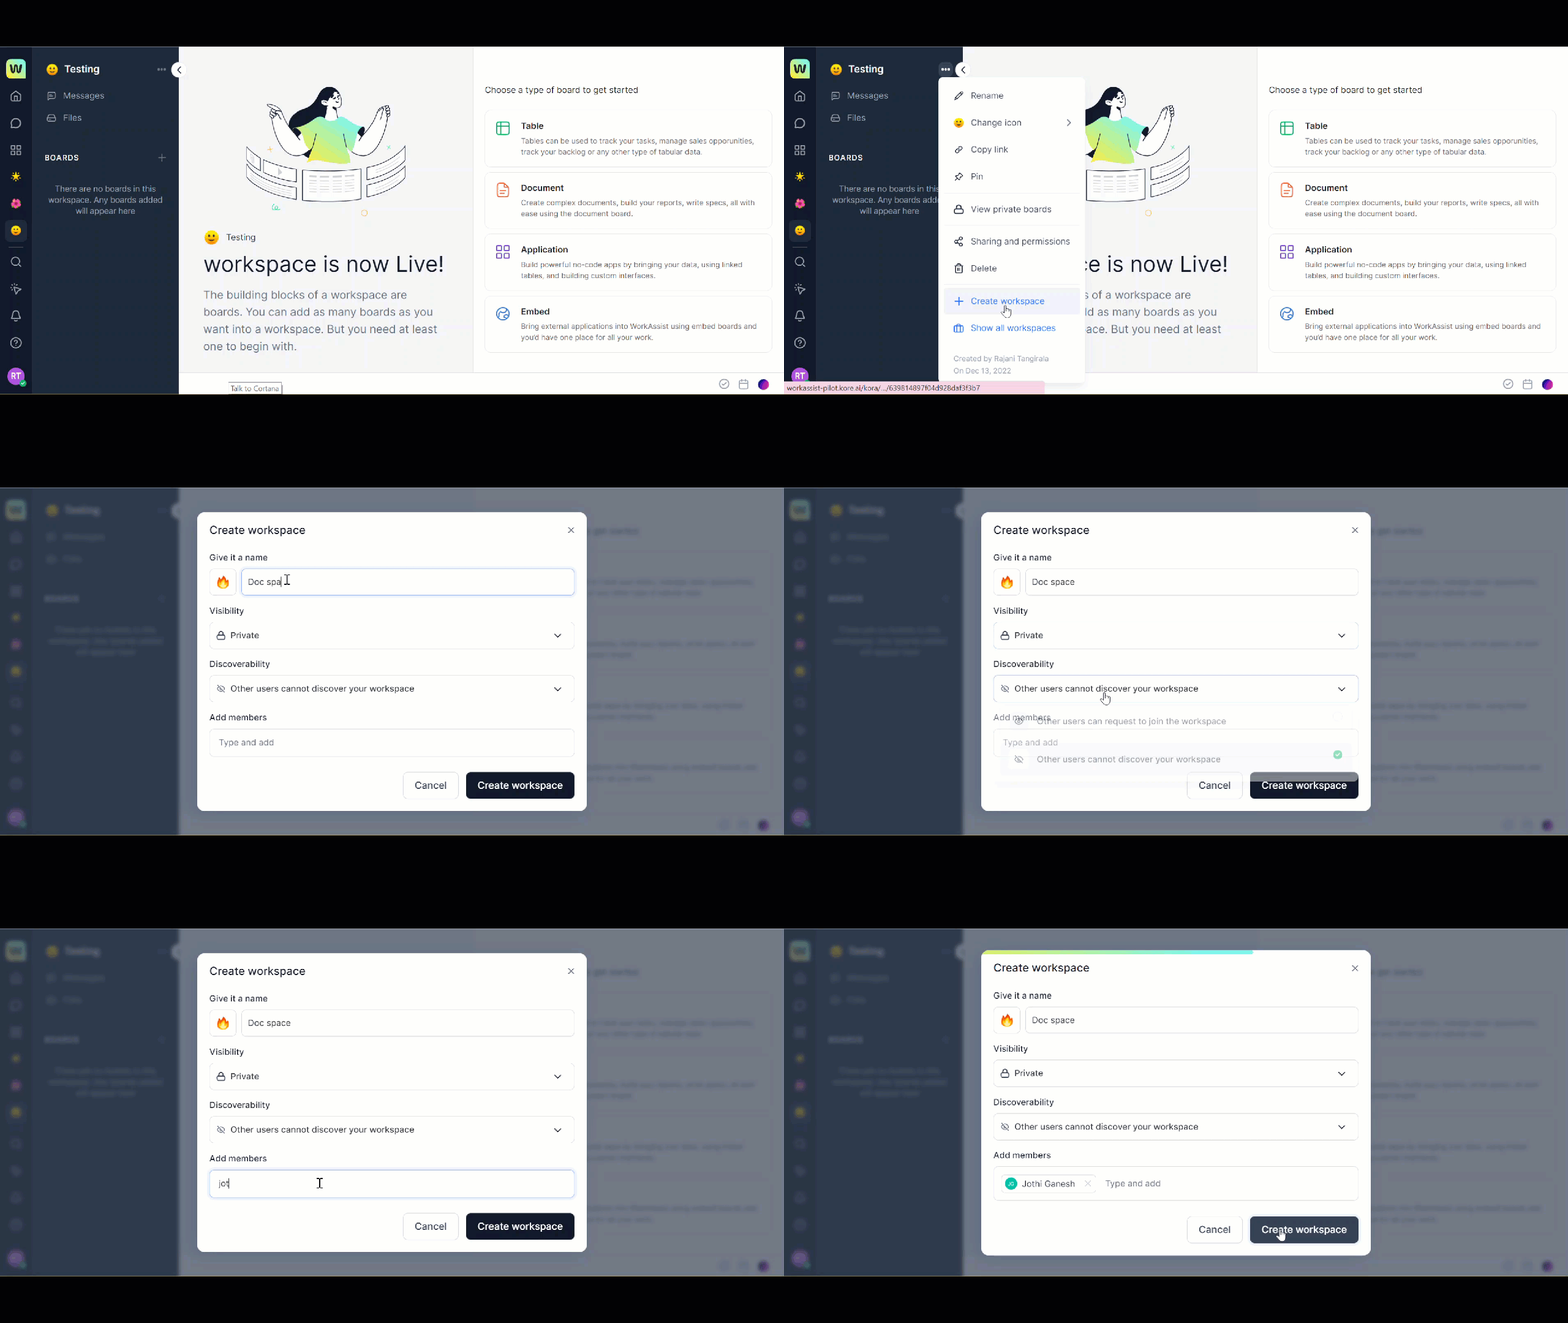
To create a workspace from the left panel, follow these steps:

-
- Click the three dots icon corresponding to the <Workspace name>on the left panel of the Workspace landing page. A pop-up with a list of options is displayed.
- Click +Create workspace. The Create Workspace dialog box is displayed.
Note: Repeat the process that is documented from step 3 of the preceding procedure to continue.
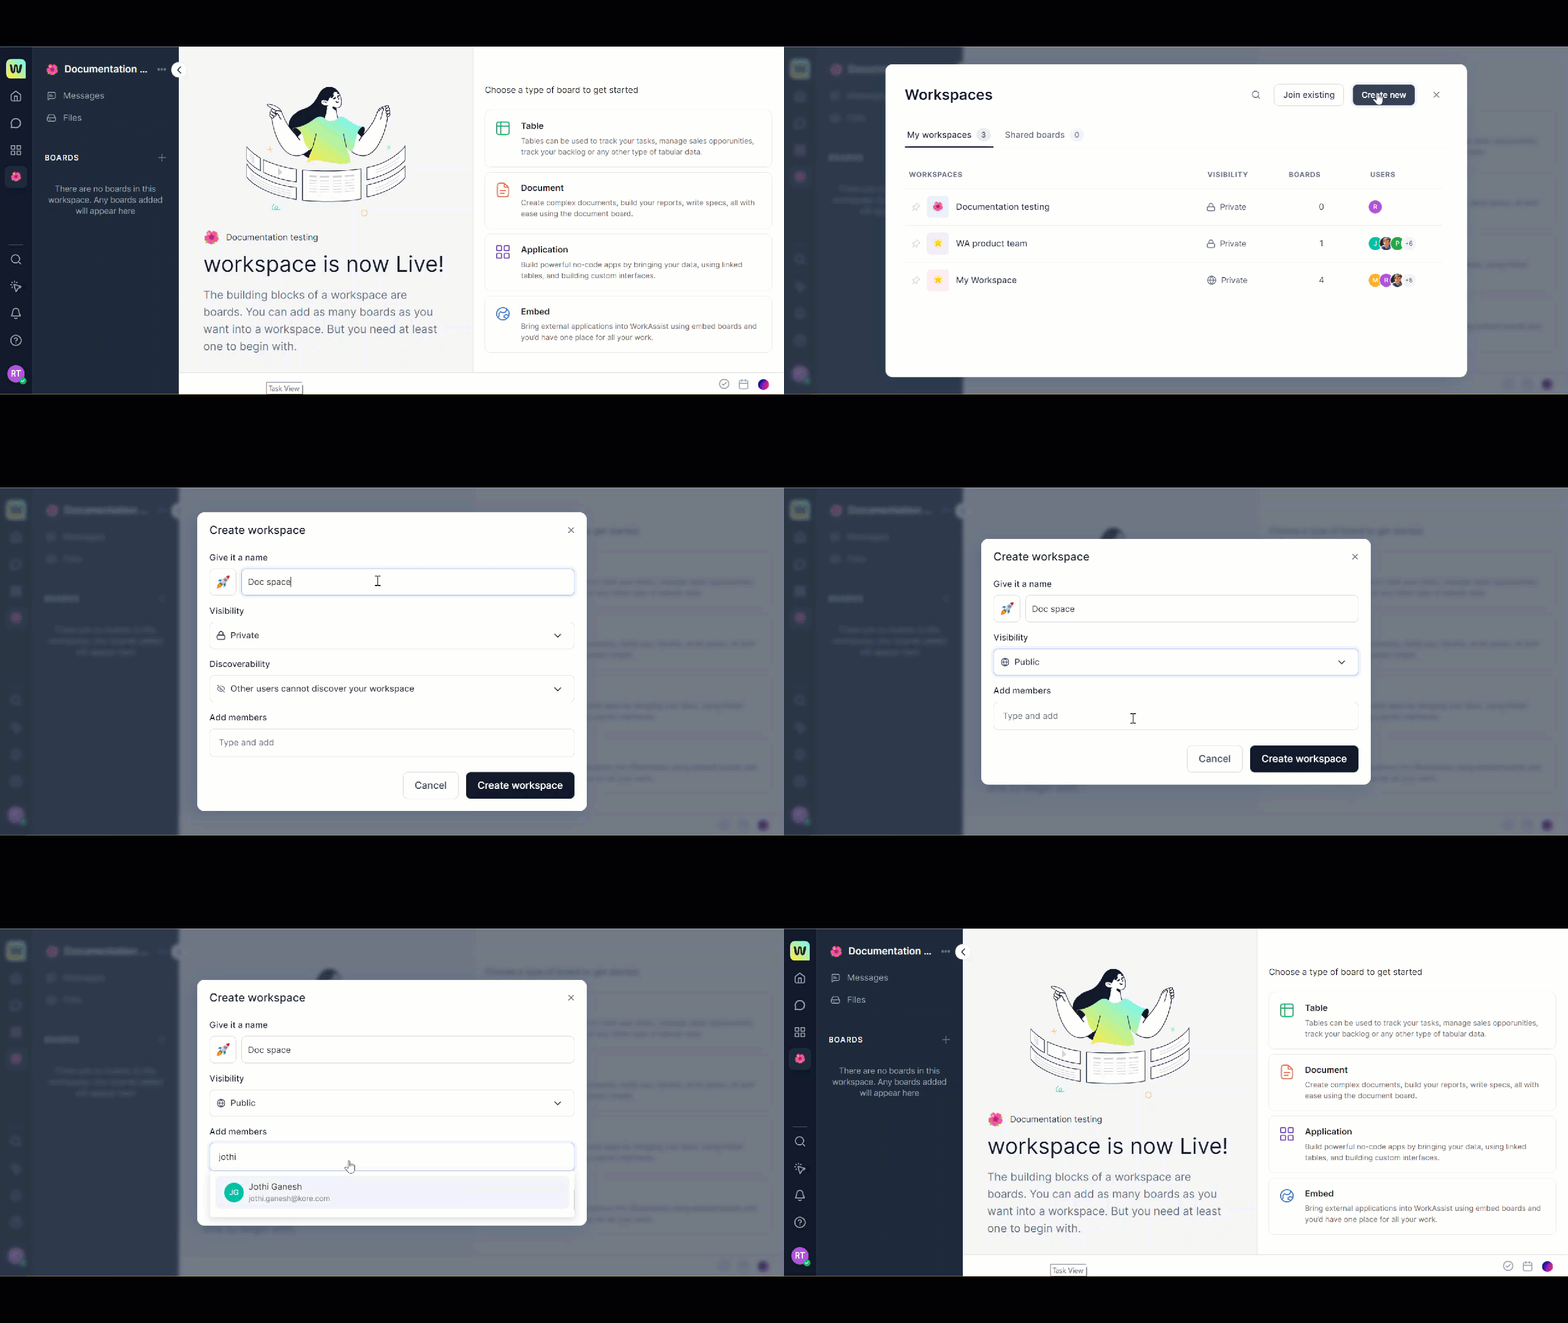
To create a workspace from the Workspace landing page, follow these steps:

-
- Click the
 icon on the primary navigation panel. The Workspaces page is displayed.
 - Click Create new. The Create Workspace dialog box is displayed.
Note: Repeat the process that is documented from step 3 of the preceding procedure to continue.
- Click the