GETTING STARTED
Introduction
Core capabilities of Workspace.ai
Release Notes
Product Keyboard Shortcuts
FAQ

WORKSPACES - ORGANIZE YOUR WORK
Workspace Overview
Create a new workspace
Join an existing workspace
Perform other actions on a workspace board
Upload files to your workspace
Add Boards to workspace
Create Folder

TABLE
Table Overview
Create a new table from scratch
Import data into your table
Connect to an existing data source
Create a new table from a template
Add a column to the table
Collaborate using Add ON in a table
Add a new view to the table
Other options in the table
Perform other actions in the table
Perform other actions on a record in a table

APPLICATION
Application Overview
Create a new application
Add a new table to your application
Perform other actions in an application

AUTOMATIONS & INTEGRATIONS
Automations & Integrations Overview
Create automation and automation triggers
Integration with external third-party tools

DOCUMENTS
AI Document Overview
Create a new document
Create a new document from a template
Modify the document using contextual items
Manage your document
Perform other actions in the document

EMBED
Embed Overview
Embed a webpage
Perform other actions on the embedded webpage

HOME
Home page overview

TO-DOs
To-Do Overview
Create a new task
Perform other actions in the To-Dos list
Filter options in the To-do list

CALENDAR
Calendar Overview
Create a new Calendar event

UNIVERSAL SEARCH
Search Overview
How to use the search and apply filters
Connect to an external search skill for extended search

ADMINISTRATION
Add a new bot skill

WORK WITH KORA BOT
Kora Overview & Capabilities
How to use the Kora Bot
Manage Widgets in Kora Bot

ANALYTICS
Analytics Overview
Create a new dashboard
Perform other actions in a dashboard
Add a widget in a dashboard
Perform more actions on a widget

API REFERENCE
API Introduction
Generating an API key
List of APIs
User Profile APIs
Get self-user profile
Search for users account
Search for workspaces of users
Table App APIs
Search for a Table App for which user got access
Get specific tableapp by tablapp ID
Get specific table of a tableapp using table ID
Get rows of a table
Create row inside a table with content
Get specific row of a table using rowID
Update specific row of a table using rowID
Delete specific row of a table using rowID
Poll for table row updates from specific time
  1. Home
  2. Analytics Overview
  3. Perform more actions on a widget

Perform more actions on a widget

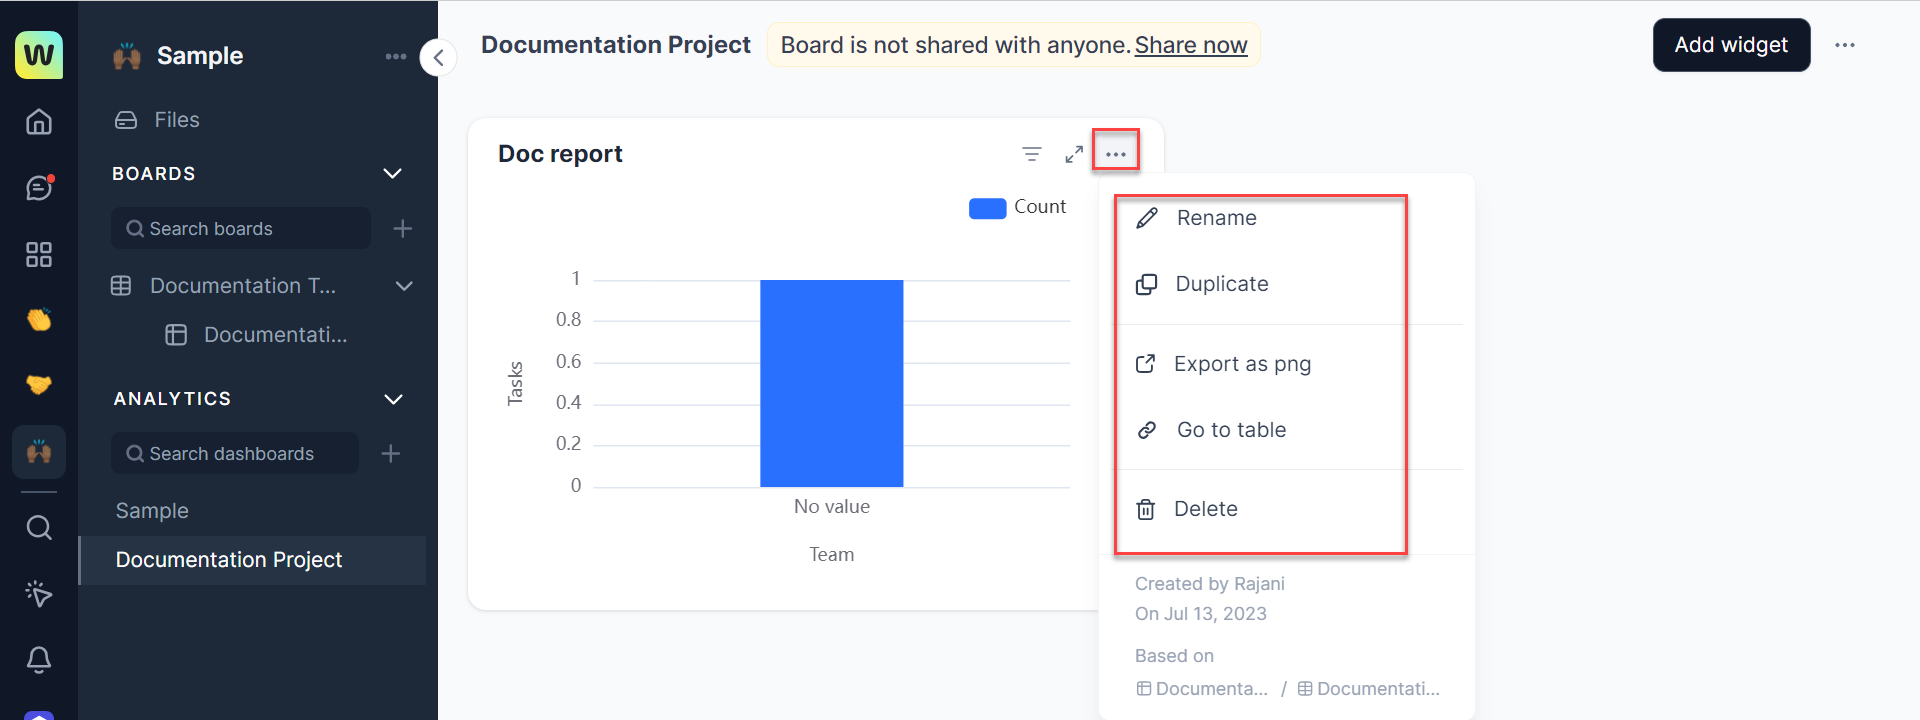
On a widget, you can perform other tasks such as deleting a widget, renaming it, duplicating a widget, go to table, and exporting the widget as a png file. You can also apply filter options so that you can view only the required fields and results.

Rename the widget

You can rename your widget as per your requirement.

To rename the widget, follow these steps:

  1. Click the three dots icon on the header section of the widget. A list of options is displayed as shown in the preceding image.
  2. Click Rename. The widget name is highlighted, and you can delete the old name and enter a name of your choice.

Export the widget as png

You can export the widget and save it for your future reference.

To export a widget, follow these steps:

  1. Click the three dots icon on the header section of the widget. A list of options is displayed as shown in the preceding image.
  2. Click Export as png from the options. The exporting process starts, and your png is exported to your downloads folder.

Go to table

  • You will be redirected to the table that you have used in creating the dashboard for quick access if required.

Delete the widget

You can delete a widget if no longer required.

To delete a widget, follow these steps:

  1. Click the three dots icon on the header section of the widget. A list of options is displayed as shown in the preceding image.
  2. Click Delete. A confirmation message is displayed to continue the deletion process.

Filter options in a widget

You can set filter options to view only the desired results. You can set ” Where” conditions to a filter.

  • Click the icon on the header of the Widget dialog to view the list of Filer by options.
  • Select the required value from the Where drop-down list and from the next drop-down list select the required condition such as “Contains”, “Does not contains” and so on.  Depending upon what value is selected in the Where field the conditions change.

Modify the options in a widget

You can modify the options in a widget such as properties, filters, and the value of X-axis and Y-axis if required.

  • Click the arrow button on the header of the Widget dialog to expand the widget. The widget view is expanded and you can view the Edit button on the right side top. Click the button to open the dialog and edit the options you require.


© 2023 Kore.ai, Inc. – All trademarks are the property of their respective owners.

Menu